|
Starting the upgrade process |
  
|
|
Starting the upgrade process |
|
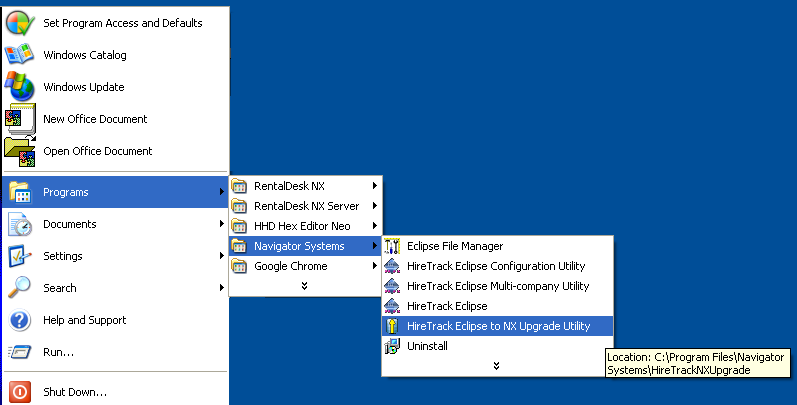
1. Always run the upgrade application from a computer that has HireTrack Eclipse already installed.
2. Once the upgrade application is running, use the folder browsers to select the HireTrack Eclipse Company folder (not the DATA sub-folder) that you wish to upgrade. If this is a network drive, then you will receive a warning as the performance will not be as fast as using the data on the local drive, however the upgrade will only take about 10% longer than if the data is local.
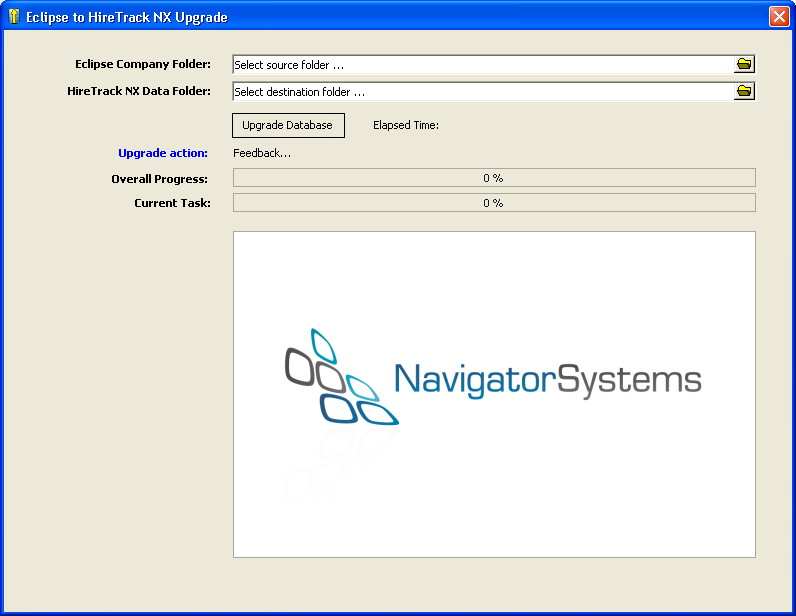
3. Select a destination folder. If this folder doesn't exist it will be created for you. This should be a folder on a local hard drive. If this is a folder on a network drive, then you can expect the upgrade process to take at least twice as long.
If the destination folder already exists and contains a HireTrack NX database, then a warning will be displayed.
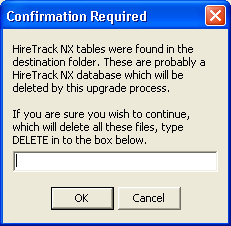
To continue with the upgrade process, type the word DELETE in the edit box and the existing NX database will be deleted off the hard drive.
4. Press the Upgrade Database button to commence the process which may take anything from 3 to 60 minutes depending on the size of your database, possibly longer if you have selected a database on a network drive.
NOTE: Some of the stages of the upgrade require extensive database processing. During this time the cursor will change to ![]() and the Elapsed Time display will not update.
and the Elapsed Time display will not update.
As the upgrade progresses, various prompts may be displayed depending upon your specific data.